 |
| DIY Flooring Installation |
DIY Flooring Installation: A Step-by-Step Guide for Every Material
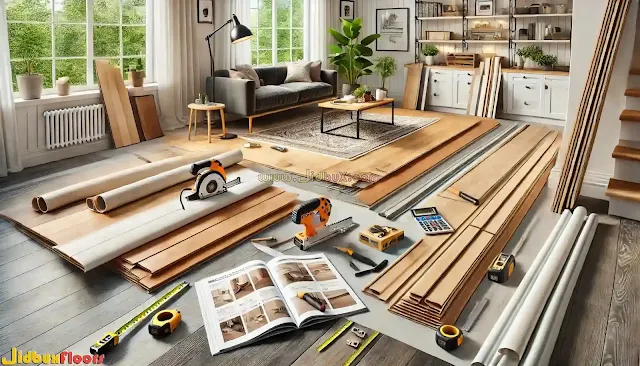
When it comes to home improvement, installing new flooring is one of the most impactful upgrades you can make. Whether you’re looking to revamp a single room or transform your entire home, DIY flooring installation is a cost-effective and rewarding option. However, different flooring materials require specific techniques and tools. In this guide, we’ll walk you through the installation process for various flooring types, ensuring you achieve professional-looking results.
Why Consider DIY Flooring Installation?
Many homeowners opt for DIY flooring installation to save money and gain hands-on experience. While professional installation guarantees expertise, taking on the project yourself can be satisfying and budget-friendly. Before diving in, it’s crucial to understand the specific requirements for each flooring type.
Step-by-Step Guide for Different Flooring Materials
- Hardwood Flooring Installation
Materials Needed: Hardwood planks, underlayment, nails or glue, saw, tape measure, chalk line, spacers.
Steps:- Get the Subfloor Ready: Make sure it is spotless, completely dry, and perfectly level. Use a leveling compound if necessary.
- Acclimate the Wood: Store hardwood planks in the room for at least 72 hours to adapt to temperature and humidity.
- Lay the Underlayment: Install a moisture barrier or underlayment to prevent water damage and improve insulation.
- Mark Your Starting Point: Use a chalk line to ensure straight rows.
- Install the First Row: Place spacers along the walls to allow for expansion and secure the planks using nails or adhesive.
- Continue Installation: Stagger the planks in a brick pattern for a natural look.
- Finishing Touches: Remove spacers, install baseboards, and clean the surface.
2. Laminate Flooring Installation
Materials Needed: Laminate planks, underlayment, spacers, tape measure, saw, tapping block.
Steps:- Clean and Level the Subfloor.
- Install Underlayment: Roll out the underlayment and tape seams together.
- Plan the Layout: Arrange planks to ensure a staggered pattern.
- Click and Lock System: Begin at one corner and snap planks together row by row.
- Cut Around Obstacles: Use a jigsaw to fit planks around doorways and edges.
- Install Trim and Baseboards.
3. Vinyl Plank Flooring Installation
Materials Needed: Vinyl planks, utility knife, ruler, underlayment (if required), adhesive (for glue-down type).
Steps:- Prepare the Surface: Clean and level the subfloor.
- Measure and Plan the Layout: Start from a straight edge.
- Install the Planks: For click-lock vinyl, snap planks together; for peel-and-stick, remove backing and press firmly.
- Cut Where Necessary: Use a utility knife for precise cuts.
- Seal the Edges: Use transition strips where needed.
4. Tile Flooring Installation
Materials Needed: Tiles, mortar, tile spacers, notched trowel, grout, sponge.
Steps:- Prepare the Subfloor: Ensure it's stable and even.
- Apply Mortar: Spread adhesive using a notched trowel.
- Lay Tiles: Place spacers between tiles to maintain even gaps.
- Cut Tiles to Fit: Use a tile cutter or wet saw.
- Allow Drying Time.
- Apply Grout and Clean the Surface.
5. Carpet Installation
Materials Needed: Carpet rolls, carpet tape or tack strips, knee kicker, carpet cutter.
Steps:- Prepare the Floor: Remove old carpet and clean the subfloor.
- Install Tack Strips: Place them around the perimeter.
- Roll Out Carpet Padding.
- Lay the Carpet: Stretch and secure it using a knee kicker.
- Trim Excess and Secure Edges.
Q&A: Addressing Common DIY Flooring Concerns
Q: How do I know which flooring material is best for my space?
A: Consider factors such as moisture levels, durability, and aesthetic appeal. Hardwood is ideal for living areas, while vinyl or tile works well in high-moisture spaces like bathrooms and kitchens.Q: Can I install new flooring over the existing one?
A: It depends on the material. Laminate and vinyl can be installed over existing floors if they are level and in good condition. Tile and hardwood usually require removal of the old flooring.Q: What is the biggest mistake to avoid when installing flooring?
A: Not preparing the subfloor properly. Uneven or dirty subfloors can lead to poor adhesion, warping, or gaps in the flooring.Q: How do I maintain my newly installed flooring?
A: Regular cleaning with appropriate products is essential. Avoid excessive moisture on wood and laminate, and use gentle cleaners for vinyl and tile. Carpets should be vacuumed frequently.Conclusion
DIY flooring installation is a rewarding project that enhances your home’s beauty and functionality. By carefully selecting the right material and following these step-by-step guides, you can achieve a professional finish without hiring a contractor. Whether you're a beginner or an experienced DIYer, proper preparation and patience will ensure a successful flooring transformation.

